In the vast, blocky canvas of Minecraft, your server’s spawn hub isn't just a starting point; it's the beating heart of your community, the grand overture to your world. It’s the very first impression players get, a crucial crossroads that dictates navigation, sets the tone, and fundamentally shapes their entire experience. Crafting exceptional Minecraft Server & Spawn Hub Designs isn't merely about aesthetics; it's about engineering engagement, fostering community, and providing seamless functionality. This guide will walk you through transforming that initial login into an unforgettable entry point, proving that a well-designed spawn hub is the secret ingredient to a thriving server.
At a Glance: Crafting Your Perfect Spawn Hub
- First Impressions are Everything: Your spawn hub is the face of your server, influencing player retention and community vibe.
- Beyond Beauty: Great designs combine stunning aesthetics with intuitive navigation and robust functionality.
- Plan with Purpose: Define your server's theme and game modes before a single block is placed.
- Essential Elements: Always include welcome areas, clear pathways, teleportation hubs, and protected zones.
- Leverage Tools: Utilize building tools like WorldEdit and consider professional pre-built schematics to save time and ensure quality.
- Iterate and Evolve: Player feedback is gold; be ready to refine and update your spawn hub as your server grows.
Why Your Spawn Hub is More Than Just an Entrance
Think of your server’s spawn hub as the lobby of a grand hotel, the town square of a bustling city, or the command center of a starship. It's the central nervous system, serving multiple critical roles far beyond merely existing as a place where players first appear.
The Decisive First Impression
We’ve all been there: joining a new Minecraft server, only to land in a chaotic, ugly, or utterly confusing spawn area. What's your immediate reaction? Often, it’s a quick disconnect. Conversely, a breathtaking, well-organized, and welcoming spawn hub immediately signals professionalism, care, and an exciting world to explore. It sets expectations, invites exploration, and makes players want to stay. This initial emotional connection is vital for player retention and building a loyal community.
The Functional Crossroads
A stellar spawn hub isn't just nice to look at; it's a powerhouse of functionality. It’s where players:
- Learn the Rules: Clear signboards, NPCs, or even interactive lore provide essential information.
- Access Game Modes: Portals, warps, or NPCs guide players to different parts of your network (Survival, SkyBlock, Factions, Mini-games).
- Connect with the Community: Gathering spaces, notice boards, and trading areas foster interaction.
- Get Started: Shops, beginner kits, or quest givers provide initial resources and direction.
Without clear guidance here, even the most intricate server can feel like a labyrinth, frustrating new players and driving them away.
Setting the Tone and Brand Identity
Your spawn hub is a direct reflection of your server's unique identity. Is your server a whimsical fantasy realm, a gritty post-apocalyptic wasteland, a high-tech sci-fi utopia, or a minimalist survival experience? The architectural style, color palette, landscaping, and even the ambient sounds in your spawn hub should immediately communicate this theme. It's your server's brand identity distilled into blocks, helping players quickly decide if this is the right world for them.
Understanding the Core Principles of a Stellar Spawn Design
Building a great spawn hub requires a thoughtful approach, balancing artistic vision with practical considerations. Let's break down the foundational principles.
Clarity & Intuitive Navigation
Imagine trying to find your way through a maze blindfolded. That’s how a confusing spawn hub feels. Prioritize clear pathways, distinct zones, and obvious signage.
- Flow: Guide players naturally towards key areas. Wide paths, clear distinctions between zones, and logical placement of portals are essential.
- Signposting: Use legible text, iconic imagery (e.g., a sword for PvP, a house for survival), and color-coding to make destinations unmistakable.
- Points of Interest: Create prominent landmarks (a towering statue, a grand archway) that help players orient themselves.
Aesthetics & Theme Cohesion
Visual appeal is paramount, but it must be consistent. A jumbled mix of styles feels jarring and unprofessional.
- Unified Theme: Decide on a core theme (medieval, futuristic, nature, etc.) and stick to it throughout your build. Every block, every texture, and every detail should reinforce this theme.
- Palette & Textures: Choose a harmonious block palette. Avoid using too many contrasting block types in one area, which can look chaotic. Instead, learn to blend textures gracefully.
- Storytelling: Use the environment to tell a story or hint at your server's lore. Ruined structures, ancient symbols, or futuristic installations can spark player imagination.
Scalability & Future-Proofing
Your server isn't static; it will grow, evolve, and introduce new features. Your spawn hub needs to be ready for that.
- Modular Design: Can you easily add new portals, shops, or event spaces without tearing down the entire structure? Design with expansion in mind.
- Buffer Zones: Leave some empty, stylistically consistent areas around your main hub that can be developed later.
- Version Compatibility: As Minecraft updates, ensure your chosen blocks and design elements remain viable. Minecraft Spawn.com, for instance, offers professional builds compatible with various Java and Bedrock editions, a crucial consideration for longevity.
Performance Optimization
A laggy spawn hub will drive players away faster than an ugly one. Complex builds with excessive entities, intricate redstone, or too many moving parts can cripple server performance.
- Block Choice: Certain blocks (like transparent blocks with complex textures) are more performance-intensive. Use them judiciously.
- Redstone Complexity: Keep redstone to a minimum in high-traffic areas, or ensure it's optimized.
- Entity Count: Reduce the number of NPCs, item frames, armor stands, and other entities, especially where many players congregate.
- Chunk Loading: Large, sprawling builds might load many chunks simultaneously, increasing strain. Consider verticality or compact designs. For more on keeping things running smoothly, check out tips on optimizing server performance.
Choosing Your Spawn Style: A Design Toolkit
Before you lay a single block, envision the kind of world you want to build. Your spawn hub's style should reflect your server's core identity and functionality.
Hub Types: Matching Design to Function
- Minimalist & Functional: For servers prioritizing quick action and minimal distraction, like PvP or mini-game networks. Focus on direct pathways to game modes, simple information boards, and efficient use of space. Aesthetics are clean, perhaps industrial or modern.
- Grand & Immersive: Ideal for role-playing, expansive survival, or creative servers where atmosphere is key. These hubs often feature elaborate architecture, intricate landscaping, hidden secrets, and detailed lore elements. They aim to awe and draw players into the world immediately.
- Modular & Expandable: Best for servers that plan significant growth or frequent updates. These designs incorporate easily extendable wings, platforms, or unassigned portal frames. Think a central core with radiating arms, or a series of interconnected floating islands.
- Game-Mode Specific: Tailored precisely to a specific game mode. A SkyBlock spawn might feature a giant floating island; a Factions spawn might look like a heavily fortified castle; a mini-game lobby might be a bustling arcade.
Architectural Inspirations: What World Will You Build?
The beauty of Minecraft lies in its versatility. You can draw inspiration from virtually any real-world or fantastical setting.
- Fantasy & Medieval: Think towering castles, ancient ruins, enchanted forests, dwarven strongholds, or bustling market towns. Stone, wood, and terracotta are your friends. This style is often rich in detail and storytelling.
- Sci-Fi & Futuristic: Gleaming chrome, complex machinery, neon lights, and sleek geometric shapes characterize this style. Picture cyberpunk cities, space stations, advanced research labs, or alien landscapes. Quartz, concrete, and blackstone are excellent choices.
- Nature & Organic: Embrace the natural world with massive trees, winding rivers, cascading waterfalls, custom mountains, or entire floating island ecosystems. This style often feels calming and invites exploration. Greenery, natural blocks, and water features are central.
- Modern & Urban: Recreate cityscapes with skyscrapers, parks, cafes, and intricate road networks. Think sleek lines, glass, and concrete. This style often suits creative build servers or city-roleplay experiences.
Remember, you don't have to build everything from scratch. Services like Minecraft Spawn.com offer professional, pre-built server builds that cater to every popular game mode and architectural style, providing a high-quality foundation without the monumental time investment. You can also Explore more about Grabcraft for countless ideas and schematics.
Essential Elements for Every Great Spawn Hub
Regardless of your chosen style, certain elements are practically mandatory for a functional and engaging spawn hub.
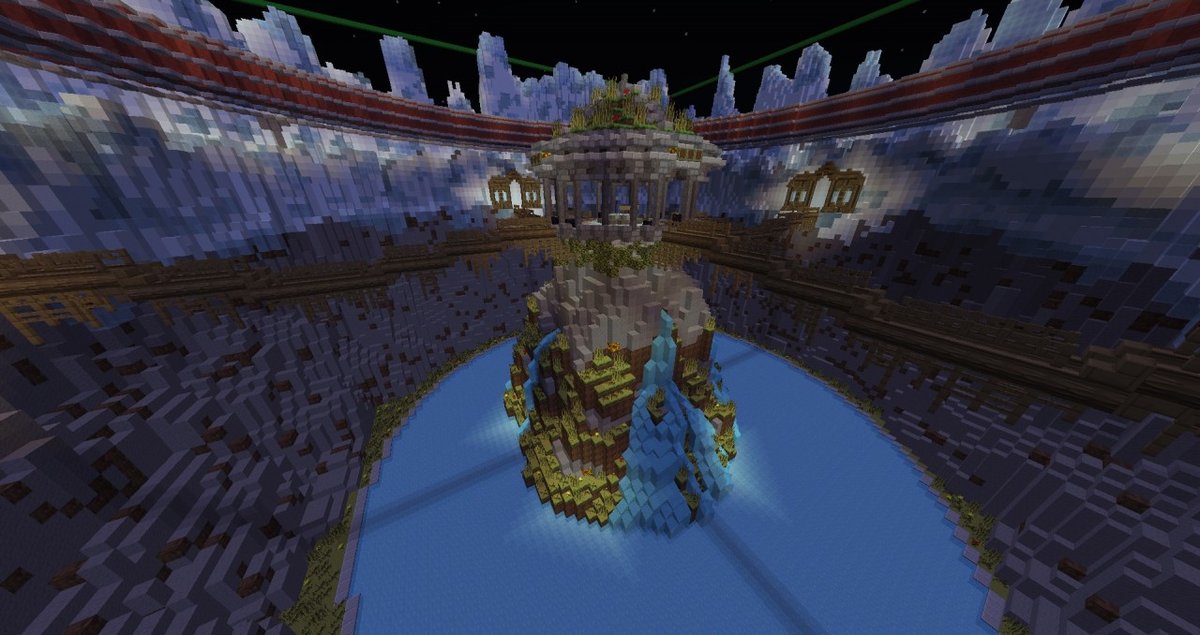
The Central Focal Point
Every good spawn hub needs a visual anchor – something grand and eye-catching that draws the player's gaze and acts as an immediate landmark. This could be a colossal statue, a towering beacon, a magnificent fountain, a unique tree, or a grand monument symbolizing your server’s identity. This point of interest helps players orient themselves and adds a sense of awe.
Welcome Area & Information Boards
This is where players get their bearings.
- Welcome Message: A prominent, concise greeting.
- Rules & Guidelines: Clearly displayed. Short and sweet is best; link to a longer version if needed.
- Server Lore/Mission: A brief intro to your server's story or purpose.
- Navigation Guide: A simple map or directional signs to key areas.
- Donation/Voting Links: Often subtly integrated.
Consider using non-player characters (NPCs) with custom dialogue to deliver information in a more engaging way.
Teleportation Hubs/Portals
This is the backbone of server navigation, especially for networks with multiple game modes or large worlds.
- Clear Labeling: Each portal or warp point needs unambiguous signs indicating its destination (e.g., "Survival," "SkyBlock," "PvP Arena").
- Thematic Design: Integrate portals seamlessly into your hub's aesthetic. A fantasy portal might be an enchanted archway; a sci-fi portal could be a shimmering force field.
- Centralized vs. Distributed: A single, large portal room is common, but you could also have smaller, themed portals distributed throughout your spawn.
Shopfronts & Economic Zones
Many servers thrive on player-driven economies.
- Admin Shop: For essential items or currency exchange.
- Player Shops: Designated plots or areas where players can set up their own shops.
- Marketplace: A bustling area that visually reinforces the server's economy.
Ensure these areas are easily accessible but don't overwhelm the main navigation paths.
Community Boards & Event Spaces
Fostering interaction is key to a lively server.
- Notice Boards: For server announcements, upcoming events, or player requests.
- Meeting Points: Open areas, fire pits, or elaborate auditoriums where players can gather and socialize.
- Mini-Arenas: Small spaces for impromptu duels or simple mini-games to break the ice.
Anti-Griefing Measures & Protected Zones
Your spawn hub should be impervious to player modifications.
- WorldGuard Regions: Implement robust protection to prevent players from building, breaking, or placing blocks in the spawn area.
- Spawn Point: Ensure the actual player spawn point is within a safe, protected zone, ideally a small, enclosed area that funnels players into the main hub. This also prevents spawn camping.
- Safe Landing: If players can fall from your spawn, ensure there’s a safe landing spot with no lava or deadly drops.
Visual Storytelling & Lore Integration
Elevate your hub from a mere collection of blocks to a living world.
- Architectural Clues: Build structures that hint at a backstory – a partially ruined castle, ancient glyphs, abandoned machinery.
- Prop Placement: Use banners, item frames, and custom heads to add intricate details that tell a subtle story.
- NPC Dialogue: Use plugins to give NPCs unique personalities and snippets of lore.
Crafting Your Spawn Hub: Step-by-Step Design Process
Building a complex spawn hub can feel daunting, but breaking it down into manageable phases makes it far more achievable.
Phase 1: Concept & Planning – The Blueprint
Before you place a single block, grab a notebook, a whiteboard, or even a simple graphics program.
- Define Your Server's Core: What's the main game mode? What's the overarching theme? Who is your target audience? (e.g., "A survival server with a strong medieval fantasy theme, for casual players.")
- Sketch it Out: Draw rough top-down layouts. Where will players spawn? Where are the portals? Where's the central focal point? How do pathways connect everything? Don't aim for perfection, just clarity.
- Gather Inspiration: Collect images, videos, or existing builds that resonate with your theme. Look for ideas on Grabcraft or other build repositories.
- Block Palette Selection: Choose 3-5 primary block types and 2-3 accent blocks that fit your theme. This ensures cohesion.
- Scope Definition: Be realistic about your building skills and time commitment. A simpler, well-executed design is always better than an overly ambitious, unfinished one.
Phase 2: Layout & Core Structure – The Skeleton
Now, translate your sketches into the game world using basic blocks.
- Mark the Spawn Point: Use a temporary beacon or a pillar of light to clearly mark where players will first appear.
- Block Out Main Structures: Use simple, contrasting blocks (like wool or dirt) to define the footprint and rough height of your central focal point, main pathways, portal hubs, and other major zones. This is your "skeleton" or "greybox" phase.
- Establish Pathways: Create the main routes players will take. Are they wide? Narrow? Straight? Winding? Test the flow by walking through them.
- Test Scale: Ensure your structures feel appropriately grand or cozy. A building that looked huge on paper might feel tiny in-game, or vice-versa. Adjust heights and widths as needed.
Phase 3: Detailing & Aesthetics – Bringing it to Life
This is where your vision truly takes shape, adding the "meat" to your skeleton.
- Block Replacement: Systematically replace your temporary blocks with your chosen palette. Focus on wall textures, roof patterns, and floor designs. Vary block usage to add depth without creating visual noise.
- Landscaping: Integrate the environment. Add custom trees, mountains, rivers, lakes, or floating islands. Terrain generation tools can be invaluable here.
- Lighting: Strategic lighting dramatically affects atmosphere. Use torches, lanterns, glowstone, or custom lighting solutions (like hidden sea lanterns) to illuminate paths and highlight features. Good lighting also prevents hostile mob spawns.
- Small Details: Add benches, planter boxes, banners, fences, signs, and other small elements that make the area feel lived-in and complete. For guidance on advanced building techniques, explore online tutorials and communities.
Phase 4: Functionality Integration – The Nervous System
With the build looking good, it's time to make it work.
- Portal Setup: Implement your teleportation system. Whether it’s command blocks, server warps, or specific portal plugins, ensure they are correctly linked and labeled.
- Information Systems: Place signs, create NPCs with dialogue, and set up interactive lore elements.
- Shop Configuration: Establish your admin shops and player shop zones.
- Protection: Apply WorldGuard regions or similar land protection to safeguard your spawn from griefing.
Phase 5: Testing & Refinement – The Polish
The build isn't finished until it's been thoroughly tested.
- Player Perspective: Log in as a new player. Is it easy to navigate? Is information clear? Does it feel welcoming?
- Technical Check: Test all portals, shops, and interactive elements. Look for command errors or plugin conflicts.
- Performance Check: Monitor your server's TPS (ticks per second) in the spawn area. Is there any noticeable lag? Adjust details or entity counts if needed.
- Gather Feedback: If possible, invite a few trusted players or friends to give honest feedback. What did they like? What confused them? What could be improved?
- Iteration: Don't be afraid to go back and tweak elements. Design is an iterative process.
Beyond the Basics: Advanced Tips for Pro Designers
For those looking to push the boundaries of their spawn hub, these techniques can elevate your build to legendary status.
Leveraging Powerful Build Tools
Forget hand-placing every block for large structures.
- WorldEdit: An essential plugin for large-scale building. It allows you to select areas and perform commands like filling, replacing, copying, pasting, and rotating sections of your build. Absolutely indispensable for efficiency.
- VoxelSniper: Perfect for terraforming and organic sculpting. It lets you create custom terrain, smooth landscapes, and carve intricate shapes with brush tools.
- Schematics: Pre-built sections saved as
.schematicfiles can be imported into your world using WorldEdit. This is how services like Minecraft Spawn.com deliver their professional builds, saving countless hours.
Custom Terrain Generation
Default Minecraft terrain is fine, but custom generation can create truly unique and awe-inspiring backdrops for your spawn. Use plugins like TerrainControl or WorldPainter to sculpt custom mountains, valleys, floating islands, or deep canyons that are perfectly suited to your theme.
Lighting & Shaders for Atmosphere
Beyond just preventing mob spawns, lighting is a powerful atmospheric tool.
- Hidden Lighting: Use glowstone, sea lanterns, or Shroomlights cleverly hidden behind stairs, slabs, or in walls to create ambient light without visible sources.
- Color-Coded Lighting: Certain blocks emit colored light (like redstone lamps for red). Use these subtly to enhance specific areas or moods.
- Shader Packs: While client-side, encouraging players to use shader packs compatible with your server's aesthetic can dramatically enhance the visual experience, making your lighting and custom builds pop.
Redstone Contraptions for Interaction
If optimized, redstone can add incredible interactivity.
- Automatic Doors: Grand entrances that open as players approach.
- Interactive Puzzles: Small challenges within the spawn that reveal lore or secrets.
- Animated Displays: Redstone-driven piston feeds or light shows for dynamic visual interest.
- Custom NPCs: Use plugins like Citizens to create interactive NPCs that offer quests, dialogue, or teleportation services. You can also integrate custom plugins and commands to create unique interactions that go beyond standard Minecraft functionality.
NPCs & Dialogues for Immersive Storytelling
Beyond simple signs, NPCs can be the voice of your server's lore.
- Quest Givers: Provide introductory quests that help new players understand the server mechanics.
- Lore Keepers: NPCs who share snippets of backstory, guiding players through your world's narrative.
- Merchants: Themed vendors who sell unique items relevant to your server's theme.
Common Pitfalls to Avoid
Even seasoned builders can stumble. Steering clear of these common mistakes will save you headaches and improve player experience.
- Over-cluttering: Too many details, signs, or interactive elements can make a spawn feel overwhelming and messy. Less is often more; let key features breathe.
- Under-designing: On the flip side, a sparse, uninspired spawn signals a lack of effort and won't engage players. Find that sweet spot between minimalist and grand.
- Poor Navigation: This is arguably the biggest sin. If players can't figure out where to go or what to do, they'll leave. Always prioritize clear pathways and signage.
- Ignoring Server Performance: A beautiful but laggy spawn will frustrate players and ultimately deter them. Regularly monitor TPS and optimize complex areas.
- Lack of Scalability: Building a spawn that can't be expanded or updated without major overhauls will become a significant bottleneck as your server grows. Plan for the future.
- Inconsistent Theme: Mixing too many architectural styles or block palettes creates a jarring, unprofessional look. Stick to your chosen theme.
- No Protected Zones: Failing to protect your spawn hub means it's vulnerable to griefing, which can destroy weeks of work and ruin the player experience.
Maintaining and Evolving Your Hub
Your spawn hub isn't a one-and-done project. It's a living, breathing part of your server that requires ongoing care and attention.
- Regular Updates: As your server grows and changes, so too should your spawn. Add new portals for new game modes, update information, or refresh aesthetic elements.
- Community Feedback: Actively solicit input from your players. What do they like? What's confusing? Are there features they'd love to see? Community involvement builds loyalty.
- Seasonal Events & Decorations: Introduce temporary decorations for holidays or special events. A Halloween-themed spawn, a Christmas winter wonderland, or a spring festival can inject new life and excitement.
- Performance Audits: Periodically check your spawn's impact on server performance. As plugins change or new Minecraft versions are released, optimizations may be needed. For a deeper dive into optimizing server performance, consider reviewing dedicated guides to keep your server running smoothly.
Finding Inspiration and Ready-Made Solutions
Feeling a little overwhelmed or in need of a creative spark? You're not alone!
- Explore Other Servers: Visit popular servers and networks. Pay attention to what you like and dislike about their spawn hubs. Take mental notes or screenshots (with respect to their intellectual property, of course).
- YouTube & Image Galleries: Platforms like YouTube are filled with incredible build showcases and speed builds. Image galleries (e.g., Pinterest, Planet Minecraft) offer a vast repository of visual inspiration.
- Community Builds: Join Minecraft building communities. Seeing what others create can be incredibly motivating and provide new techniques.
- Professional Pre-Built Bundles: For server owners on a tighter schedule or with limited building expertise, pre-built spawn hubs are a game-changer. As Minecraft Spawn.com highlights, these services offer high-quality, professional builds for various game modes and editions at an affordable cost, allowing you to cut down on the building portion and focus on server management and community growth. They provide a solid, professional foundation for your server, enabling you to launch quickly with a polished look. You might also want to explore guides on choosing the right server host to ensure your new, beautifully designed spawn has a reliable home.
Your Next Step: Building Your Dream Minecraft World
Crafting an outstanding Minecraft server spawn hub is a journey that blends creativity, technical skill, and an understanding of player psychology. It’s more than just a place; it's an experience, a statement, and a promise of adventure. By focusing on clear navigation, cohesive aesthetics, robust functionality, and smart planning, you can design a spawn hub that not only welcomes players but compels them to stay, explore, and become part of your thriving community. So, gather your blocks, sharpen your vision, and start building the vibrant world you've always dreamed of. Your players are waiting.